Thursday, December 15, 2011

My Favorite Things...

I haven't done a post of my favorite things in awhile, but I have been motivated by the time of year. It is the time of year for comfort foods! Here are some of my favorites...


I start every cold morning with a cup of hot tea and black tea is my favorite. I love tea so I'm not too picky about the flavor, but my favorite is definitely French Vanilla. I could drink it everyday and not get tired of it.


My favorite real meal comfort food is absolutely baked macaroni and cheese. It has become a favorite for just about everyone in my family. My brother-in-law now requests that I make it every Thanksgiving. My secret is using at least 3 different types of cheese to add a lot of flavor and vanilla almond or soy milk for a little sweetness.


Speaking of sweet, I have a major sweet tooth! Because of that, I have two sweet favorites. Who doesn't love marshmallows? I drove an hour to get some of these vegan marshmallows. I love the toasted coconut covered marshmallows. Really, I went just for the marshmallows...and they were worth it! 


Just last week I discovered my other favorite comfort sweet and it is chocolate, of course. I went to Trader Joe's and while waiting in line I spotted these dark chocolate peanut butter cups. I am really not a dark chocolate person, but my mom is so I bought them for a stocking stuffer for her. Well they sat on my kitchen counter for 2 days and it ended up being 2 days too long. It's like they were talking to me, "Come on, try me. It's okay, no one's looking." So I did. Shhh, don't tell my mother, but I have eaten almost all of them now. There is just something about the peanut butter and the dark chocolate doesn't have the flavor that is usually to strong for me. These are only $.99/bag! I can't wait to go back.


What's your favorite comfort food?

Tuesday, December 6, 2011

Craft Room Storage

Storage is fun for me and I love the challenge of making it functional and cute (or at least not ugly). Craft rooms often require creative storage because craft spaces tend to be small and those of us who craft have a lot of supplies! In addition to supplies we still need space to actually craft. So here are some ideas that work for me... 


I love glass jars and received these in my favorite color from a friend. They are perfect for small items like lace, loose ribbon and glue sticks. They are clear so you can easily see inside, but since they are colored what's inside doesn't look cluttered.


I love vintage and antique items so I use them as much as I can. I found this old juice bottle and use it to store my wooden clothespins.


It is easy to get a little out of control with supplies and having more than needed. I don't need that much ribbon, so I limited myself by using this basket which I painted white. It fits rolls of ribbon perfectly and will store the amount I need. Any more than will fit in the basket and I make myself part with some.


Plastic tubs are almost unavoidable as they are such a great solution for so many items. I love them because they stack easily, are clear so I can see what is inside, and they come in any size you may need! These are shoe box size and only cost $1-2.00 each. I put only one type of item in each one (e.g. stamps) and then label them to make it even easier to find what I am looking for. I store mine under my crafting table so they are easily accessible too.


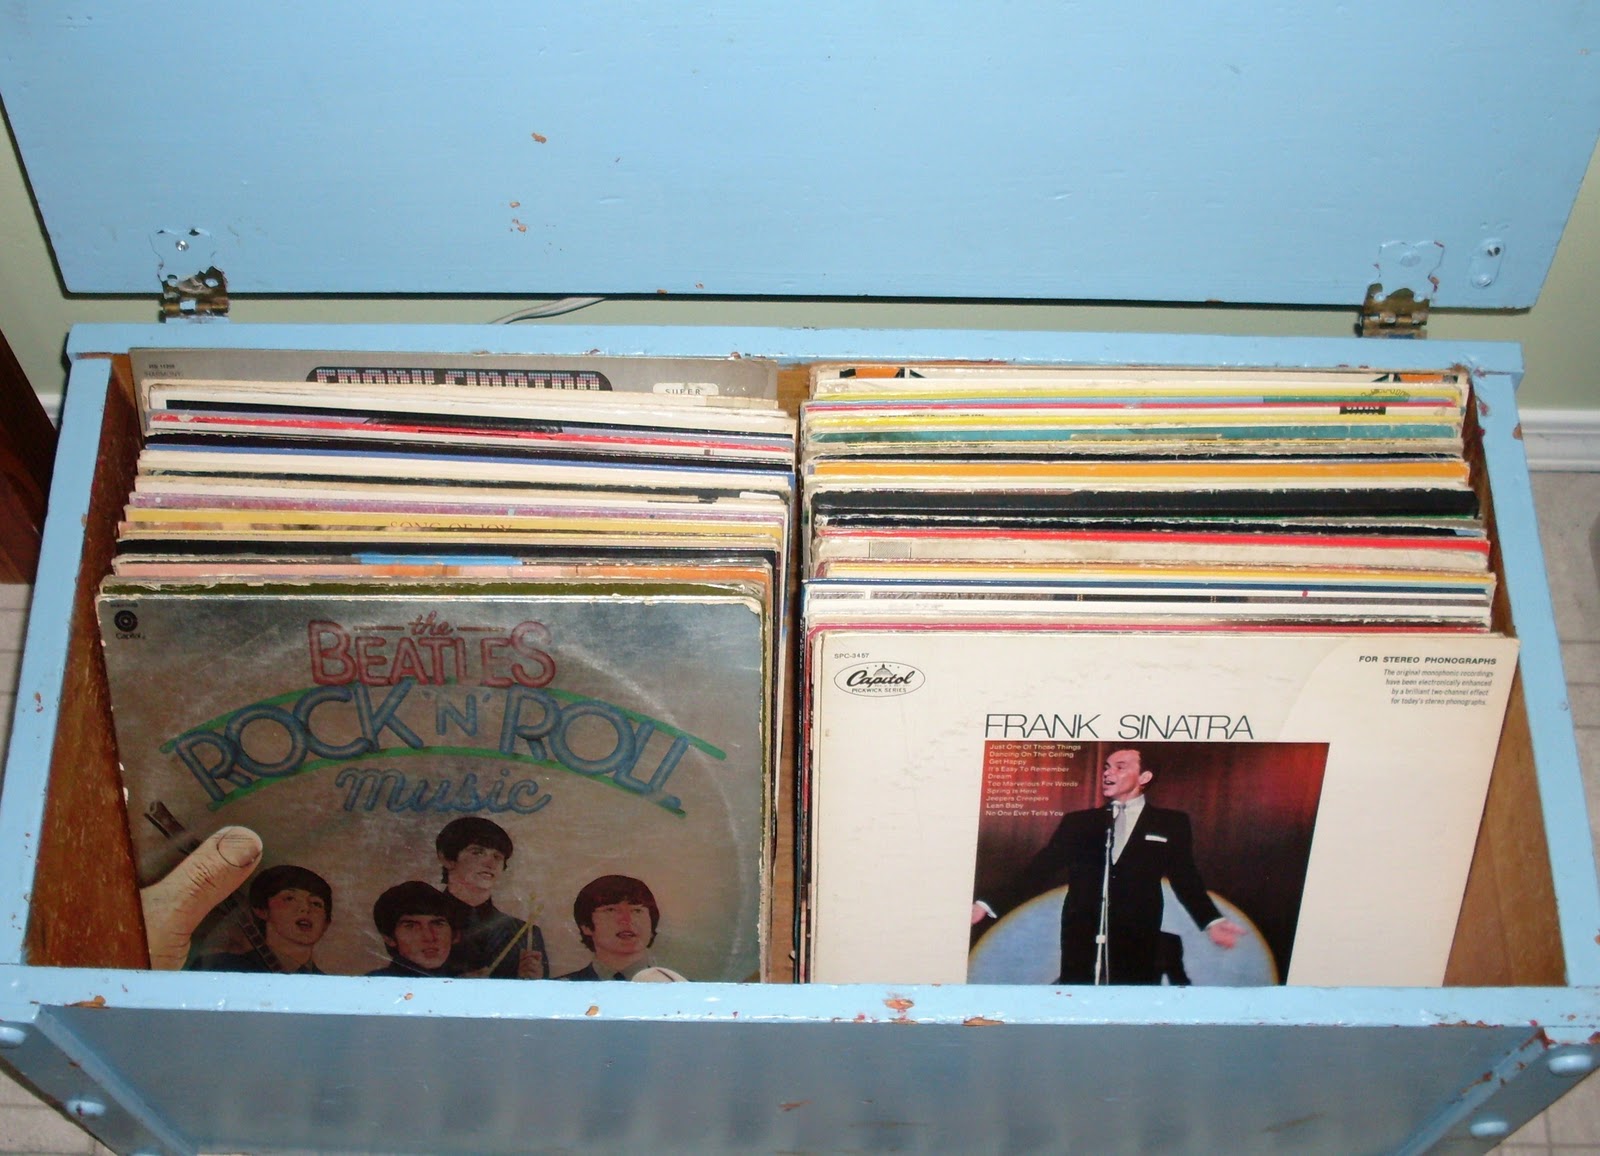
You need a spot to sit or for visitors (usually kids) to sit. I found this old toy box in the perfect color for my room and added a couple of pillows.


What's even better? Multi-functional pieces. Of course there's tons of storage space inside, so I use the toy box to store my record collection. I love listening to old records while I work!


Storage space can be found anywhere! I found this wicker shelf which was pumpkin orange and I painted it white (surprise). I love it because it is taking advantage of the vertical space in the room and serves as a shelf for decorative pieces, but also has more storage in it. It actually stores my computer cords and software disks.


I am always looking for more ideas for storage. What are some ideas you love or areas you struggle with?

Friday, December 2, 2011

Guest Tutorial: Fabric Covered Button Magnets

A fabulous tutorial of fabric covered button magnets from Dena Designs. Enjoy!

This is the perfect project for a group crafting party - kids and adults will love it. You need very few supplies and you can make multiple magnets in one short session. If you're like me, you have tons of scrap fabric lying around - use them for these wonderful covered buttons.


Gather:
Self-cover button kit (find these at your local fabric store)
½” magnets
Assortment of colorful fabrics, a small print works best
1” strips of colorful tulle
Hot glue gun
Scissors
Needle nose pliers


Create:
  1. Cut out circles of fabric to cover your buttons, the circles should be twice as big across as the buttons that you want to cover.
  2. Before covering, use your needle nose pliers to remove the wire loop from the back of the button. It will be easier to attach the magnet if there is a flat surface.
  3. Follow the instructions on the package to cover each button with the fabric of your choice.
  4. Begin adding cute ruffles or flower cutouts to the back of the button with your hot glue gun. Cut a 1” strip of tulle that can be tightly gathered at the back of the covered button. Secure with hot glue. For my buttons, I added some fabric flowers that I cut using a Sizzix die cutting machine. You could even add hanging ribbons or paper streamers.
  5. Once you have decorated around the button, hot glue a magnet to the back so that it can be used.


Place six or so lovely magnets in a pretty box and you have the perfect gift for a special friend.


Visit Dena Designs for more inspiration and you can follow her on Twitter. I do!

Wednesday, November 30, 2011

Before and After

I found this wall shelf at a thrift shop. I loved the curvy shape of it and that it had a mirror and a great little shelf perfect for a vase. 


It had a good coat of varnish on it that I had to sand off. This is it after sanding and wiping it down, before painting.


I originally pictured it in white but decided to paint it yellow - something a little different. I like the rustic look to it.


Friday, November 18, 2011

Thanksgiving Decorating

Thanksgiving is right around the corner and I am excited about getting ready for it! I love Fall colors and incorporating them in the home for Thanksgiving festivities is ideal. Here are some of my favorite ideas...

Bring the outdoors in. 
 
Just go outside and look around at the all that Autumn brings us: pine cones, leaves, twigs, pumpkins... Create a vignette near the door to welcome guests.

bhg.com


Use what you have.
 
Be creative with what you have. I love this idea of a plant stand holding pots that can display flowers and hold all of your necessities for the big meal.

countryliving.com


Simplify.
 
A statement doesn't have to be made with a lot of work, materials and mess. A row of pumpkins on a mantle definitely says Autumn and is something anyone can do.

acountryfarmhouse.blogspot.com


Incorporate vintage and antiques that have been in the family. 
 
Fill vintage candy dishes and glass jars with nuts. Set a row of old dishes across the back of your mantle or a shelf and place Fall colored leaves in front. It gives Thanksgiving and old-fashioned feel and reminds us of family.

starshinechic.blogspot.com


Add color. 
 
We all think of orange when we think of Thanksgiving and Fall, but you could do an all yellow table or all purple. Pick any color or combination of colors you love and gather whatever you can find to create a table that is warm and inviting for your guests.

purestylehome.blogspot.com


Remember the meaning. 
 
Thanksgiving is about being thankful. For me, it always goes back to family and friends. Set out photocopies of pictures of family and friends who will be with you on Thanksgiving and those who cannot. It makes for a great conversation starter.

countryliving.com


Think about your centerpiece.
 
When thinking of decorating for Thanksgiving, a lot of thought goes into the centerpiece since a lot about Thanksgiving revolves around the dinner table. My biggest pet-peeve about centerpieces is when they are too tall, thus making it impossible to converse with the person across the table without standing up. Think about scale and it doesn't have to be a bouquet. I love the simplicity of this idea of stacking tea cups and saucers and accenting with richly-colored roses. 

bhg.com
  
Wishing you and yours a fabulous day of thanks on Thanksgiving!

Monday, November 14, 2011

Two Before and Afters

I recently found these little wooden shelves on a trip and loved the shape and the fact that they were a pair. I thought they would look cute staggered on a wall with 1 item on each, like a milk glass vase or small candle holder.


I decided to paint them blue because the shape reminded me of clouds. The strong color would make something like white milk glass really pop.


Now for an indoor/outdoor project... 


I found this rusty old plant stand and thought it was a cute because of the size and the flowers on the sides.


I love rust just as much as the next person (especially outside), but this was not cute rusty. It was "Help me!" rusty. So I scrubbed the rust off, primed with a rust-proof primer, then painted it this light green.


I love how it turned out and that it can be used indoors or outdoors.

Thursday, November 10, 2011

Tutorial: Fire Starter

In a desire to save money and do something better for the environment, I researched fire starters for the upcoming winter season. It is getting cold where we live and we're planning to do a lot of fires this winter, but don't want to buy fire starters. So after looking for ideas, here is what I came up with - something that is easy to do using materials you can find in your own home.


Materials:
- cardboard egg cartons
- parrafin wax (canning wax)
- dryer lint
- mulch (saw dust, dry leaves, tiny sticks)
*Optional: coloring and liquid fragrance


Start by laying out all of your materials, then begin melting the wax on the stove using a double boiler method. I used 2 pans that I already had set aside for wax, but you can also melt the wax in a large tin can in order to save your pans and hold the can with plyers. Be careful not to burn yourself. The wax takes a few minutes to melt. *At this point you can add coloring or fragrance to the wax as desired.


While waiting for the wax to melt (it will take a few min.), fill the compartments of the egg carton(s) with the dryer lint and mulch. The dryer lint is great to top the cups off with because it packs the other materials down well. 


All that is left is the pour the wax into each egg compartment filling them as much as you can. All of the materials you put in the egg carton are highly combustible and burn quickly. The wax slows the burn of the fire starter, giving the wood time to catch fire.


Allow the wax to dry and cool. I recommend setting the cartons on a paper towel on a surface that the wax won't damage if it soaks through. Once cool they are ready to use by simply tearing off one or two of the egg cups to put in the fireplace or fire pit and lighting. If you want it to look nicer or to give as a gift, put 1-2 of the cups in a plain paper sack and tie with cotton string. This entire thing can be put in the fire, so the bag does not have to be opened. 


Be warm and safe!

Friday, November 4, 2011

Clothespins Galore!

Clothespins aren't just for laundry anymore! I started selling wooden clothespins in my shop because there are so many things you can do with them. 

www.blogs.babycenter.com


I enjoy covering them with pretty paper or vintage maps and then you can attach magnets to them. You can do the same with fabric by simply pre-cutting to the size of the clothespin. This looks really pretty when the clothespin has been painted first.


www.missparty.net


The creativity of people amazes me. This mirror wreath is perfect for this time of year and could be painted any color or a combination of colors and hung by a ribbon.


www.countryliving.com


Another great idea for the upcoming season is this use in gift-wrapping. I think I may try this one. What's great is that they can be re-used by the recipient.


www.prudentbaby.com


And who knew clothespins could be an architectural feature? I don't think anyone would know those are clothespins.


www.countryliving.com


Any other ideas you have seen or done?

Tuesday, November 1, 2011

A Trip to Mount St. Helens


I have lived in the beautiful, picturesque Pacific Northwest my entire life and can't imagine living somewhere that doesn't surround me with endless green beauty. The beauty is everywhere so I have yet to experience it all. I recently experienced Mount St. Helens which erupted in 1980 and greatly affected a very large area. 


I had no idea the magnitude of that day on the natural surroundings here in the Northwest nor of the resulting understandings for science. 


We traveled about 3 hours from home to see this amazing site. The elevation is so high we were literally driving through clouds! My kids opened their windows hoping to catch some to take home.


Many trees have been planted to begin to reforest the area destroyed. So much has grown back, yet it still appears almost desolate. One can be fined and prosecuted for walking on the land over 5 miles from the volcano because of the delicate growth.


My children enjoyed the trip and learning about the volcano, my mother loved it, and my husband and I enjoyed it. It is a great experience for any age. I am glad we went and am still surprised by how amazing the nature there was considering what we are surrounded with on a daily basis here. 


We stayed in cute cabins just a 30 min. drive from Mt. St. Helens. Even in the cabin area we saw nature unlike what we see at home. 


Deer walked around like there wasn't a human for miles. This picture is not zoomed in. The deer was eating grass less than 5 feet from the road and we stopped and watched him for several minutes.


It was an experience I wish everyone could experience and highly recommend it for anyone who has the opportunity to go.


Thursday, October 27, 2011

Multipurpose Before and After

A Before and After of a project I recently completed. This is one that I added to my Etsy shop and is available for purchase. It is a wooden box I came across - actually I came across two of them, but the other one had a solid wood bottom and the whole thing looked so shabby and cohesive that I left it that way.


The bottom of this one was clearly a different shade and therefore was begging to be painted. So I used a classic white with a distressed, white-washed finish and I love how it turned out.


I love old wooden boxes because they have so many uses:
- holding plants
- planting a succulent garden
- hanging as a shelf or curio
- setting on a large table as a base for a grand centerpiece
- drilling holes in the sides to fill with candles and hang for an indoor/outdoor candelier...